Category Archives: baking

Cream Cheese Monkey Bread

Standard

Craving something cinnamon-y, chewy, creamy and comforting during this holiday season? (Not to mention simple, affordable and easy to make!) I’ve got the perfect solution for you. You only need six basic ingredients! CREAM CHEESE MONKEY BREAD. It will make all of your dreams come true.

I think I spent a total of less than $6 to make these. Spectacular right? The biscuits and cream cheese were majorly on sale at the time, which made a huge difference, but I can’t imagine having to spend more than $10 total any given day. It’s basically a quick and easy trick for a frosted cinnamon roll craving. It tastes just a Cinnabun but without all of the yeast rising waiting business. I bought a new bundt pan especially for this recipe, but I’m sure you could just as easily glob the biscuits together in a round springform or cake pan. This is amazing heated up for breakfast with a cup of tea or coffee, but especially straight out of the oven!

You’ll sleep good the night after you eat this!

Cream Cheese Monkey Bread

Serves 12

Recipe adapted from Pip & Ebby

  • 2/3 cup dark brown sugar
  • 2/3 cup granulated sugar
  • 1 tablespoon cinnamon
  • 1 teaspoon cardamom (optional)
  • dash of nutmeg (optional)
  • Two 12-ounce tubes refrigerated flaky buttermilk biscuits
  • One 8-ounce package neufchatel cream cheese, cut into 20 cubes
  • 3⁄4 cup unsalted butter, melted

Directions:

  1. Preheat oven to 350ºF. Spray a 12-cup bundt pan with cooking spray; set aside. In a medium bowl, combine the sugars and spices; set aside.
  2. Slice 10 discs of dough from each tube of biscuits. Set discs on a flat surface and set one cube of cream cheese in the center of each piece of dough. Wrap edges of dough up and around the cheese so all that is visible is the top side of cream cheese cube. Place 10 dough-wrapped cheese cubes, cheese-side-up, in bottom of prepared pan. Top with half of the sugar mixture and half of the butter. Top with the remaining dough-wrapped cheese cubes, cheese-side-down, the remaining sugar and remaining butter.
  3. Bake in the preheated oven for 40 minutes. Invert onto a serving platter and serve!

Vegan Pumpkin Pie Brownies

Standard

Oh man, it’s a total shame I haven’t posted this recipe sooner. This is totally the equivalent to a “#latergram” on Instagram type status. I made this back toward the beginning of the year for a dinner party and was too busy to post the recipe. So here we are, and it’s in perfect time to add to this wonderful pumpkin season!

Can’t decide if you’re in the mood for something chocolatey or with pumpkin? Brownies? Pumpkin? Why not have both?! This is absolutely luscious. Think of a pumpkin pie with a brownie crust/base. It’s literally thee perfect combination. My friends definitely seemed to think so. (And no one knows it’s vegan! Shhh…)

I think this would be a great addition to a Thanksgiving feast!

Vegan Pumpkin Pie Brownies

Makes 8 brownies

Adapted from Vegan Cookies Invade Your Cookie Jar

For the brownie layer:

  • 4 ounces bittersweet chocolate, melted
  • 1 cup canned pumpkin puree
  • 1/2 cup sugar
  • 1/4 cup canola oil
  • 1 teaspoon vanilla extract
  • 3/4 cup whole wheat flour
  • 1/4 cup cocoa powder
  • 1 tablespoon cornstarch
  • 1/4 teaspoon baking soda
  • 1/4 teaspoon salt

For the pumpkin layer:

  • 3/4 cup canned pumpkin puree
  • 2 tablespoons cornstarch
  • 1/2 cup almond milk
  • 1/3 cup sugar
  • 1 teaspoon vanilla extract
  • 1/4 teaspoon ground ginger
  • 1/4 teaspoon ground cinnamon
  • pinches of nutmeg and allspice

For decoration: a handful of chocolate chips

  1. Preheat the oven to 350ºF. Grease a 9 in. springform pan (or use a 9 in. square pan lined with parchment paper).

To make the brownie layer:

  1. Melt the chocolate.
  2. In a large mixing bowl, mix together the pumpkin, sugar, oil and vanilla. Sift in flour, cocoa powder, cornstarch, baking soda, and salt. Stir to combine, then mix in the melted chocolate.

To make the pumpkin layer:

  1. Mix all the ingredients in a large bowl, stir until thoroughly combined.

To assemble:

  1. Use a spatula to spread the brownie layer mixture into prepared baking pan, taking care to bring the batter to the edges of the pan. Pour the pumpkin layer over it, leaving a little room at the edges if you can.
  2. Bake for 30 minutes, until pumpkin layer looks fairly firm (slight jiggling is ok), and has cracked at the edges a bit.
  3. Let the brownies cool for 20 minutes, then transfer the pan to the fridge to set for at least an hour and a half. Once set, decorate with chocolate chips, slice into wedges, and serve!


Drunken Pumpkin Chocolate Chunk Cookies

Standard

Are you drunk enough on pumpkin yet? Yeah, I didn’t think so. At least, your answer should have been no. I am here to change that.

Yes kitten! I made this batch of cookies just for you!

This is the second batch of cookies I have baked with a stout beer in the mix. It gives the batter an interesting fluffy texture and makes the cookies poof up in the end. You can smell a hint of it when you bite into these, especially with the added in fleur de sel to enhance the chocolate notes. Think of a pillowy pumpkin raisin cookie but with chocolate chunks, pumpkin seeds, and salt chunks instead.

I had to do quite a bit of tweaking with this batch, but it all worked out in the end (as it usually does). I had to be conservative on the liquid, and add in a bit of whole wheat flour to soak up the excess moisture. Additionally, I would recommend sticking the bowl of batter in the fridge for about a half hour to make it easier to scoop up the batter and form the shape you want. I obviously didn’t do that, but feel free to do whatever you please. I’ve become way less OCD as of late.

Eat these with a glass of pumpkin beer! You’ll get drunk off of drunken pumpkin goodness for sure!

Drunken Pumpkin Chocolate Chunk Cookies

Makes 30 cookies

  • 3 cups all-purpose flour
  • 1/2 cup whole wheat flour
  • 3/4 teaspoon baking soda
  • 1 teaspoon salt
  • 2 teaspoons pumpkin pie spice
  • 1 stick (1/2 cup) unsalted butter, softened
  • 1 cup brown sugar
  • 1/2 cup granulated sugar
  • 2 large eggs
  • 1 teaspoon vanilla extract
  • 2 tablespoons pumpkin flavored syrup (optional)
  • 1 cup stout (ie. Guinness, Samuel Smith’s Oatmeal)
  • 1 1/4 cup pumpkin seeds
  • 2 cups dark chocolate chunks
  • fleur de sel, for topping
  1. Preheat oven to 325° with rack in the oven’s center. Line two baking sheets with parchment paper.
  2. In a medium bowl, whisk together flour, baking soda, salt, and pumpkin pie spice; set aside.
  3. Using an electric mixer, cream butter and sugars on medium speed until thoroughly blended.
  4. Add eggs, vanilla and pumpkin syrup, and beat on low speed until combined. Add dry mixture until combined, then add stout in small amounts. Mix in seeds and chocolate chunks.
  5. Spoon onto cookie sheet. Sprinkle a few chunks of fleur de sel on top of the cookies and bake about 14 minutes or until golden brown.

Pumpkin Apple Streusel Cake

Standard

Sometimes I can be an indecisive gal. Trying to figure out where to go for dinner, deciding what to order on a menu, deciding what to drink, deciding what to bake… I just now realized that these are all food related.

I think I love food too much.

After looking at Pinterest and foodie magazines for hours upon hours, sometimes the pressure to make up my mind what to make becomes crippling. And then I won’t make anything at all. Sound familiar?

So when it comes to fall baking and trying to decide between a pumpkin cake and an apple pie, it’s so hard to choose. Why not have the best of both worlds at once? It’s like a buy one, get one free deal. Two in one. Double duty. You get the picture.

Imagine a pumpkin coffee cake but with sauteed apples on top. Delicious, yes? Pretty much exactly what this is. I was really happy with how it turned out, and it was relatively easy. However, I feel like something was missing. It was a little dry (maybe because of the whole wheat flour? such a conundrum, the white vs. whole wheat situation), and needed a bit more flavor, spice, and moisture. I think the recommended baking time was a bit too long (1 hour), and I took it out after 50 minutes. I would check it after 40-45 if I ever make it again. I must say, it is quite delicious with a scoop of lavender (or vanilla bean!) ice cream, or a nice cold glass of milk. It’s a perfect fall dessert or breakfast snack!

Pumpkin Apple Streusel Cake

Serves 6-8

Adapted from The Vintage Mixer

Ingredients

Sauteed apples:

  • 3 tablespoons unsalted butter
  • 3-4 large Granny Smith apples peeled and thinly sliced
  • 3 tablespoons granulated sugar
  • 1 teaspoon cinnamon
  • 1/4 teaspoon cardamom

Streusel topping and cake (made together then divided):

  • 1 1/4 cups whole wheat pastry flour
  • 1 cup brown sugar
  • 1/2 teaspoon salt
  • 1/2 cup unsalted butter softened
  • 3 tablespoons granulated sugar
  • 2 teaspoon pumpkin pie spice
  • 1 teaspoon cinnamon
  • 1 teaspoon baking soda
  • 3/4 cup canned pumpkin puree
  • 1/3 cup pumpkin Greek yogurt
  • 2 large eggs
  1. Butter and flour (or spray) an 8-in Springform Pan and preheat oven to 350°.
  2. Saute the apples in the butter on medium heat, just until they start to soften. Remove from heat and add the sugar and cinnamon. Set aside.
  3. In a stand mixer combine the flour, brown sugar and salt. Add the 1/2 cup butter and blend well. Measure out 2/3 cup of the mixture into a separate bowl to make the streusel. Add the 3 tablespoons sugar, pumpkin spices and cinnamon to this separate bowl, blend and set aside. Add the baking soda, pumpkin, pumpkin Greek yogurt and eggs to the flour mixture left remaining in your mixer. Blend until smooth, about 2 minutes.
  4. Layer the cake batter, then the sauteed apples and finally sprinkle the streusel over the top.
  5. Bake, uncovered, for about 1 hour (although, like I said. I’d do it for no more than 50 mins or so. Keep your eye on it). Allow to cool in the pan and then remove the springform. Serve with ice cream or milk!

Double Peanut Butter M&M Cookies

Standard

My stepmom is coming to visit Portland tomorrow (for the first time!) and I wanted to do or make something a little extra to make her stay even more welcoming and cozy: double peanut butter m&m cookies.

There were always cookies in the cookie jar growing up with her in the house I lived in for 18 years. It was a serious shame and deprivation to our sweet tooth(s) to run out of homemade oatmeal chocolate chip or raisin cookies. There was always a few sticks of butter sitting out on the counter to soften every few weeks. I knew it was that time. Cookie baking time.

The first thing I baked in my new apartment were these chocolate chip cookies aka. the ONLY chocolate chip cookie recipe you will ever need. I’m serious. Nothing beats those guys. And who introduced me to that recipe? My stepmother.

The inspiration for this batch came from picking up a package of autumn colored peanut butter filled m&m’s last week in the Halloween candy section. I just knew cookies were to be had. For the last several days, I toyed around with what flavored dough base I wanted to pair with them. At first I was going to go for chocolate, but I figured a light peanut butter flavor would be best.

So here’s to carrying on a cookie baking tradition into the new(est) Antolini household. Yep, that’s me!

Double Peanut Butter M&M Cookies

Makes 2 dozen cookies

Adapted from Sally’s Baking Addiction

  • 1/2 cup (1 stick) unsalted butter, softened to room temperature
  • 1/2 cup light brown sugar
  • 1/4 cup sugar
  • 3/4 cup creamy organic peanut butter
  • 1 egg
  • 1 tsp vanilla bourbon extract
  • 1/2 tsp baking soda
  • 1 1/4 cup all-purpose flour
  • 1/4 tsp salt
  • 1 1/4 cups peanut butter filled M&Ms
  1. In a large bowl, using a hand-held mixer or stand mixer with paddle attachment, cream the butter and sugars together on medium speed.  Mix in the peanut butter, egg, and vanilla. Slowly mix in the baking soda, salt and flour. Do not overmix.  Fold in the M&Ms with a wooden spoon.  Chill the dough for at least 30 minutes.
  2. Preheat oven to 350° F. Drop chilled dough by tablespoonfuls onto ungreased cookie sheet. Bake for 8-9 minutes.  Cookies will be soft, slightly browned and may appear undone.  They will firm up as they cool.
  3. Allow to cool completely. Enjoy!

P.S. Here’s a little list of (food) places I have jotted down I’d like to take her:

Portland Soup Co. for yummy artisanal sandwiches and soups

-Toro Bravo, because I have heard such great things and have yet to go there!

-Broder (because…duh)

-The Doug Fir for drinks, snooze at the Jupiter one night

Noble Rot, because the view is supposed to be amazing, and their dinner menu doesn’t look too shabby either

-Shut Up & Eat for lunch, because I’ve heard great things and have yet to try it (4.5 stars on Yelp, whaaaat?!)

La Provence for breakfast/lunch, if not, just to drool over their pastries and macarons

Verde Cocina for dinner, because I’m madly in love with their fresh pile of veggies I’ve had for their breakfasts and lunches at the farmers market and at their cafe

Bakery Bar, for the best scones in the world

Crema, my favorite go-to

Stumptown for lattes (her favorite)

-Voodoo (yes, it has to be done)

Bollywood Theater, because it’s one of the best

-Pix, even though their customer service can suck it

-Possible dinner places: Ned Ludd, Woodsman Tavern, or the 2nd Story… still haven’t been to any of those!

Besides food, other places to go:

-NW 21st & 23rd Ave.

-The Pearl + Powell’s

-Sellwood for antiques

-Hawthorne

-A movie at one of the wallet-friendly beer theaters

-Hike in Forest Park

-Laurelhurst Park

-Alberta + Mississippi

I’ll be back in a few days with a photo recap!

Soft Chocolate Stout Cookies

Standard

If you’re anything like me, you too probably have hundreds (or maybe even thousands!) Pinterest recipes pinned onto your boards. My baking board has 224 pins on it at the moment, and the general food(ie) category… 484.

Someday I will make all of these recipes, yes? (psst, here are my boards if you’re interested–let’s be pinning friends!)

I know you’re just as highly ambitious as I am.

That being said, fall is here. And it’s time to get down to business. This is my absolute favorite time of year to cook and bake, so I have a feeling I’ll be chipping away at a majority of those recipes in these upcoming months.

Here’s one that I found over the weekend when I was in the mood for chocolate, and perhaps the easiness and simplicity of baking a batch of cookies. Chocolate cookies with stout in them. Y-U-M.

I had all of the ingredients on hand (also a huge plus when I’m trying to decide on what to make) so I went ahead and did it, and absolutely do not regret it. Between my boyfriend and I, we’ve eaten over half the batch in two days.

The stout adds a spectacular new dimension of flavor, almost something you would never expect. I’ve done chocolate stout cupcakes before, but typically those recipes only call for about 1/4 cup of beer or so, nearly undetectable in the floury texture of the cake. But not in this. 3/4 of a cup, baby, chock full of chocolatey stout goodness.

Definitely a keeper, I’d say. Next time I can’t wait to try it out with a pumpkin stout and add a bit of spice to the mix!

Soft Chocolate Stout Cookies

Adapted from Butter Me Up, Brooklyn

Makes 18-24 cookies

  • 1 1/2 cups flour
  • 1/4 + 1 tablespoon unsweetened cocoa powder
  • 1/2 teaspoon salt
  • 1/2 teaspoon baking soda
  • 1 teaspoon baking powder
  • 1 1/2 cups chocolate chips
  • 1 stick unsalted butter, softened
  • 1/2 cup brown sugar
  • 1/4 cup sugar
  • 1 tablespoon molasses
  • 1/2 teaspoon vanilla
  • 1 egg
  • 3/4 cup oatmeal stout, ie. Samuel Smith’s (my absolute FAVORITE! plus you’ll have some leftover for drinking, too ;))
  1. Line two baking sheets with parchment paper. In a medium bowl, whisk together the flour, cocoa powders, salt, baking soda, baking powder and chocolate chips. In a larger bowl, beat the butter with the sugars until light and fluffy. Add the molasses, vanilla and egg and beat well. Alternate the flour and the beer with the egg mixture until combined.
  2. Chill the dough for about 30 minutes, or until it has firmed up enough to scoop out cookies, and meanwhile toward the end of chilling time, preheat the oven to 350° F. Scoop on the prepared baking sheet and bake for 15-17 minutes or until the top springs back lightly when touched. Cool completely and devour.

Owl Pumpkin Cakes

Standard

What happens when you combine owls and pumpkins? A massive explosion of love and goodness happens.

At least in my eyes…

More like these mini owl pumpkin cakes. But really, a massive explosion of love and goodness, too.

Owls and pumpkins are meant to be together. Especially at this time of year. And they happen to be two of my favorite things that exist on this planet.

When I found this owl mold “muffin” tin at Cost Plus last week, I was ecstatic. I had no idea what in the world I would do with it, but I knew it would be something good. Chocolates? Cakes? Muffins? Jello? The possibilities are endless.

It’s hard to beat hand-held bite-sized pumpkin bread loaves shaped into a little owl, though…

Perfect for a Halloween party, crafting party, owl-themed birthday party, or any reason at all!

Owl Pumpkin Cakes

Adapted from BHG Pumpkin Bread, Fall Baking 2012 Issue

Makes 24 mini loaves

  • 3/4 cup granulated sugar
  • 3/4 cup dark brown sugar, packed
  • 1/2 cup canola oil
  • 2 eggs
  • 1 2/3 cup all-purpose flour
  • 1 teaspoon baking soda
  • 1 teaspoon ground cinnamon
  • 1/2 teaspoon ground nutmeg
  • 1/2 teaspoon pumpkin pie spice
  • 3/4 teaspoons salt
  • 1/3 cup almond milk
  • 7-8 oz. (about half a 15 oz. can) pumpkin puree
  1. Preheat oven to 350°F. Spray cooking spray on the owl pan; set aside. In an extra-large bowl combine granulated sugar, brown sugar, and oil. Beat with an electric mixer on medium speed until well combined. Add eggs; beat well. Set aside.
  2. In a large bowl combine flour, soda, cinnamon, pumpkin pie spice, nutmeg, and salt. Alternately add flour mixture and the water to the sugar mixture, beating on low speed just until combined. Beat in pumpkin.
  3. Drop batter evenly into pans, about 2/3 full (will puff up a lot!). Bake 15-18 minutes, or until a toothpick inserted near the center comes out clean. You will only be able to make 12 the first time, and then make the remaining after the first batch is done (that is, of course, if you only buy one pan).
  4. Flip pan over onto wire racks and let cool. Store in an air-tight container!

Olive Oil Fig Cake

Standard

Sometimes, when you have somewhat of a crappy week, not even for any real good reason, it’s nice to have some help along the way. Sometimes you need a good book, a cozy nap on the couch with a warm quilt and your kitten, or a slice of this olive oil fig cake. I’ll take all of the above.

I saw this recipe that Tracy (Shutterbean) posted last week via Instagram and instantly began drooling. My original plan was to make a loaf of pumpkin bread that day, but that ended up being pushed aside (sorry pumpkin, I still love you!). Figs. Almond. Citrus. Olive oil. YUM. YES. PLEASE.

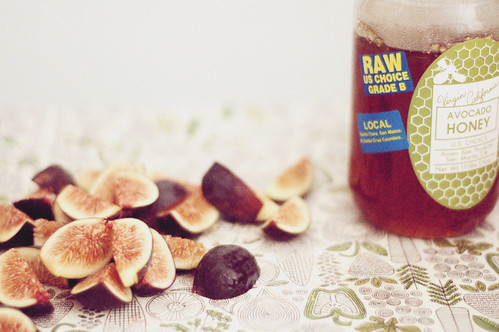
The flavors are wonderful. Lemon and orange zest, ground almond flour, extra virgin olive oil, and succulent figs roasted in honey on top? Hellomylifehaschanged. I even swapped in a bit of lavender sugar for a bit of the regular granulated kind. It reminded me of a “healthier” version of pound cake upgraded to autumn-status. I urge you to make this while fresh figs are still in season. You will not regret it.

Olive Oil Fig Cake

Makes about 6-8 slices

recipe adapted from Tracy Shutterbean & Jamie Oliver Magazine

  • 1 3/4 cups all purpose flour
  • 1 cup ground almonds
  • 1 tablespoon baking powder
  • 1 cup sugar plus 1/2 cup lavender sugar
  • 3 eggs
  • grated zest of 1 lemon
  • grated zest and juice of 1 orange (original recipe called for 2)
  • 1/2 cup extra virgin olive oil
  • 1/3 cup milk
  • 5-6 figs, quartered
  • 2-3 tablespoons honey

Preheat oven to 350 degrees F. Spray a 9×5 loaf pan with cooking spray and set aside. Place the flour, ground almonds, and baking powder in a bowl and mix together.

In a separate bowl, whisk together the sugar and eggs until fluffy. Add the citrus zest and juice, then stir in the olive oil and milk. Gently fold in the flour mixture then pour the batter into the prepared pan and bake for 40 minutes.

Push the figs into the top of the loaf. Drizzle with the honey and bake for another 30-40 minutes, or until the top is caramelized and a toothpick comes out clean. Cool and enjoy!

Pumpkin Spice Macarons

Standard

Have you ever wanted to make homemade macarons but were too intimidated to try? Don’t let all that here say about how difficult they are to make scare you. Honestly, sometimes I think people try to make things more complicated than they really are. In this case, making macarons definitely falls under that category. If you do enough research about them like I did (because I was afraid I would screw them up… see “10 Signs of a Bad Macaron” and “Parisian Macaron Crimes and Misdemeanors“), you’ll find several variations as to how to tackle them and the many things that can go wrong.

Some recommend you separate your egg whites at least 24-72 hours prior, sitting in your fridge and then setting out a few hours before incorporating them in your meringue. Some swear that you have to weigh all of your ingredients–almond flour, egg whites, and sugars (I went out and bought a kitchen scale just for that, I’ll admit). Some swear that the secret to the perfect shell is to sift the ground almond flour and powdered sugar to “weed out” all of the big nut and sugar chunks. Some emphasize the folding of the food coloring into the egg whites, to handle them gently so as to not ruin the structure of the egg protein. Some recommend you tap the cookie sheets after they’ve sat for a few minutes to remove some of the air bubbles.

Well let me tell you something. Don’t worry about any of that.

When I picked up BHG’s special magazine edition of Fall Baking, the first spread I opened to was one of these pumpkin spice macarons. It was the selling point. I hadn’t made macarons since January of this year, and I’m in a new (very small) kitchen, but I knew I’d find a way to make them happen. Reading over the recipe, they made it seem too easy. No mention about being gentle with the meringue or separating the egg whites days beforehand. Nope. None of that. I thought it was too good to be true. But I trusted them anyway and went for it.

I seriously will not ever deviate from this basic recipe again. They turned out absolutely perfect. At least to me. Maybe it’s my oven now, but the first two macaron attempts I tried came out too gooey in the center and didn’t puff up as much as I hoped. These didn’t do me wrong. And they shouldn’t do you wrong, either.

The perfect shell and “foot”.

Plus, hello! Pumpkin spice! You’ll impress all your friends and they’ll be the perfect autumn treat to “spice up” your dining room table. You will love them, and you’ll love making macarons. I’m telling you, you’ll get addicted.

Pumpkin Spice Macarons

Makes about 28-30 macarons (14-15 total when you sandwich them together)

Recipe from BHG’s Fall Baking

  • 1 1/2 cups finely ground almonds
  • 1 1/4 cups powdered sugar
  • 1 teaspoon pumpkin pie spice
  • 3 egg whites
  • 1/2 teaspoon vanilla extract
  • dash of salt
  • 1/4 cup granulated or caster sugar
  • 8 drops yellow food coloring
  • 2 drops red food coloring (I used a mix of gels: red, orange, and yellow until I got the color I wanted)
  • 1/2 cup pumpkin butter


  1. Line 2 large cookie sheets with parchment paper; set aside. In a medium bowl stir together almonds, powdered sugar and spice; set aside.
  2. In a large bowl combine egg whites, vanilla, and salt. Beat with an electric mixer on medium speed until frothy. Gradually add granulated sugar, about 1 tablespoon at a time, beating on high speed just until soft peaks form (tips curl). Stir in nut mixture and food coloring (I added the food coloring first, but I’m not sure it really matters which one you add first).
  3. Spoon mixture into a large decorating bag fitted with a large (about 1/2-inch) round tip. Pipe 1 1/2-inch circles, 1 inch apart, onto the prepared cookie sheets. Let stand for 30 minutes before baking.
  4. Meanwhile, preheat oven to 325 degrees F. Bake in the preheated oven for 9-10 minutes or until set. Cool on cookie sheets on wire racks. Carefully peel cookies off parchment paper.
  5. Spread about 1/2 teaspoon of the pumpkin butter onto bottoms of half of the cookies. Top with the remaining cookies, bottom sides down. You did it!

Vegan Basil Peach Pie

Standard

I’ll be honest, I hardly ever make pies.

I once braved it and made this anise pear pie last year, that turned out phenomenally after 4+ hours of work, but I typically stick to the “no fuss” cookies, cupcakes, and cobblers. Flipping through cookbooks of pies, seeing the gorgeous photographs and seemingly simplistic recipe list, it looks so easy. They look so perfectly polished. They don’t look like someone has spend 4-6 hours on it. No biggie.

Out of devotion to this lovely vegan baker and recipe maker, I, of course, recently purchased Vegan Pie In The Sky book by Isa Moskowitz. I’ve utilized nearly every cupcake recipe out of VCTOTW, made several batches of cowboy cookies, so pie? No big deal. It can be done.

This particular recipe caught my eye at first glance. Basil? With peaches? Heck yes. With flats of gorgeously sun kissed peaches at Trader Joe’s for five bucks, I figured it was now or never (or, next summer I suppose but you know…).

I made only one alteration to the crust recipe by substituting one cup of the all-purpose flour for whole wheat flour. The end results were delicious, but proved for a more labor intensive crust preparation. I’m not sure if I would recommend it, but nothing’s stopping you. Seriously, I spent at least four hours on this thing. At least a half hour or so preparing the crust the day before, and around 3-4 the next day chilling the crust again several times after rolling it out and making the designs and decorations. If I were hard pressed to sell it, it’s at least a $50 pie. But I’m not complaining. The perfect marriage of basil and peaches is worth it in the end.

Side note. I have never “scored” peaches, boiled them, and transferred them to an ice bath to easily peel their skins, keeping all of the meat intact. This was a tip in the book that I will forever remember in the future. I’ve never seen a peach perfectly peeled like this before. They are absolutely gorgeous. It seems like a lot of work, but it’s more fun than it sounds and I promise you’ll feel as stoked as I did with the end results.

Here’s how you do it: You’ll need (1) a big pot of boiling water; (2); a huge bowl for an ice bath; and (3) a slotted spoon to transfer the peaches. To make the ice bath, fill a huge bowl with ice and cold water. Place it right next to the stove for fast transferring. Then, score the bottoms of the peaches making an “X” in them with a knife. Place the peaches in the boiling water for one minute, then transfer them to the ice bath with the slotted spoon. After they have cooled for a few minutes, peel the skins off using the “X” as a starting point. You can pretty much just use your fingers. Slice the peaches in half, remove the pit, and cut into 1/4 in slices. Sweet!

Vegan Basil Peach Pie

From Vegan Pie In The Sky 

Makes one 9-in pie

For the Double Buttery Crust:

  • 2 1/2 cups all-purpose flour
  • 1/2 teaspoon salt
  • 3 tablespoons sugar
  • 8 tablespoons cold nonhydrogenated margarine
  • 8 tablespoons cold nonhydrogenated shortening
  • 6 tablespoons ice water
  • 1 tablespoon apple cider vinegar
  1. In a large mixing bowl, sift together the flour and salt. Mix in the sugar. Add half the margarine and shortening by about half tablespoonfuls, cutting it into the flour with your fingers or a pastry cutter, until the flour appears pebbly. Add the remaining margarine and shortening, and cut into the flour.
  2. In a cup, mix together 4 tablespoons of ice water with the apple cider vinegar. Drizzle the water and vinegar mixture into the flour by the tablespoonful, gently mixing it after each addition. Knead the dough a few times, adding more water until it holds together. You may need only the 4 tablespoons, but add up to 2 more tablespoons if needed.
  3. Divide the dough in two, roll each half into a ball, then press them into disks and wrap each in plastic wrap. Refrigerate them until ready to use, or use as directed in the recipe.

For the Basil Peach Filling:

  • 1 recipe Buttery Double Crust rolled out and fit into a 9-inch pie plate
  • 6 cups sliced peaches (see note above)
  • 3/4 cup sugar
  • 1/4 all-purpose flour
  • 2 tablespoons fresh lemon juice
  • 8 average-size fresh basil leaves, coarsely chopped
  • 1/8 teaspoon salt
  1. Preheat the oven to 425 degrees F. Combine all the filling ingredients together in a large mixing bowl, then transfer them to the prepared pie shell.
  2. Top the pie with the crust. Pinch the edges together, then trim the excess dough to about an inch and crimp the edges together.
  3. Make five slits in the middle of the pie to let the steam escape (or use cut outs like I did).
  4. Bake for about 25 minutes. Lower the heat to 350 degrees F and slip on a pie crust shield to prevent it from overly browning. Bake for an additional 30 minutes. Filling should be bubbly and the crust should be golden. Place pie on a cooling rack and let cool or about a half hour before serving.